
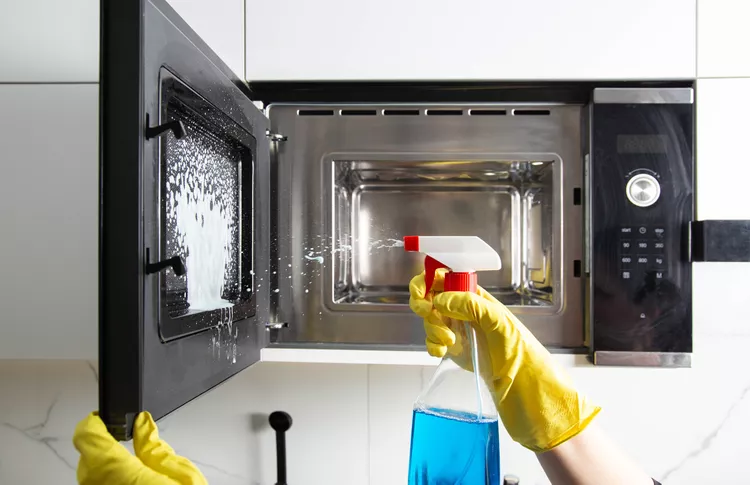
A greasy microwave interior usually needs moisture, patience, and repeated gentle wiping rather than harsh scrubbing. Splattered sauces and cooking oils can harden after repeated heating, making fresh spills much easier to remove than old residue.
The safest approach is to cool the appliance, loosen the buildup, and clean removable and fixed surfaces separately. Avoid flooding vents, controls, or openings with liquid.
Prepare the Microwave Before Cleaning
Unplug the microwave when practical and make sure the interior is cool. Remove the turntable and any removable support pieces so they can be washed separately.
Read the manufacturer’s cleaning instructions if the interior has a special coating or unusual finish. Abrasive pads and aggressive cleaners can scratch surfaces or damage protective finishes.
Start With Loose Debris
Use a soft cloth or paper towel to remove crumbs and dry food particles first. That prevents loose debris from being dragged through grease during wet cleaning.
Soften Dried Grease With Steam
A microwave-safe bowl of water can help soften dried splatter. Heat it until the interior becomes steamy, then leave the door closed briefly so the moisture has time to work.
General cleaning notes saved alongside everyday publishing material can be useful for tracking household routines, but your microwave’s manual should guide any appliance-specific precautions.
After steaming, carefully remove the bowl because the water and container may be hot. Wipe loosened residue with a soft, damp cloth.
Clean the Interior in Small Sections
Work from the upper surfaces downward so loosened residue doesn’t fall onto areas you’ve already cleaned. Pay attention to corners, the ceiling, and the area around the door where fine grease films often collect.
For stubborn spots, hold a damp cloth against the residue before rubbing. Household notes kept with general diary content can remind you which cleaning methods worked without encouraging repeated use of stronger chemicals.
| Area | Gentle Method | Avoid |
|---|---|---|
| Interior walls | Damp soft cloth | Abrasive pads |
| Turntable | Mild dish soap | Sudden temperature changes |
| Door edges | Light wiping | Flooding openings |
| Dried splatter | Steam and repeat | Sharp scraping tools |
Wash Removable Parts Separately
Wash a cooled glass turntable with warm water and mild dish soap unless the manufacturer specifies another method. Avoid placing a hot glass tray directly into cold water because sudden temperature changes may damage it.
Before reinstalling parts, dry them thoroughly. Keeping a simple maintenance schedule among digital lifestyle notes can make light cleaning routine enough that heavy grease has less time to build up.
Check the roller ring and the area beneath the tray for food particles before reassembly.
Cleaning Mistakes That Make the Job Harder
More force isn’t always more effective. Metal scrapers, rough scouring pads, and excessive pressure can leave permanent scratches while doing little to dissolve oily residue.
Spraying cleaner directly into vents or openings is another poor approach. Apply liquid to the cloth instead so you can control moisture.
Don’t mix household cleaners unless their labels specifically permit it. Repeated steaming and wiping is slower than aggressive scrubbing, but it is often kinder to the microwave’s interior.
Frequently Asked Questions
Can I use dish soap inside a microwave?
A small amount of mild dish soap on a damp cloth can be useful for greasy residue. Wipe away remaining soap afterward and avoid allowing liquid to collect in vents or openings.
Why does grease keep returning after cleaning?
A thin oily film may remain after the first wipe. Use a fresh damp cloth for another pass and dry the surface so loosened grease isn’t redistributed around the interior.
How often should a microwave interior be cleaned?
Wipe fresh splashes soon after the microwave cools. A more complete cleaning can be done whenever visible residue or odors build up rather than waiting for a thick greasy layer.
Make Light Cleaning the Normal Routine
A greasy microwave becomes much easier to manage when residue is softened before it is scrubbed. Start with steam or a damp cloth, work gently, and repeat the process on stubborn areas instead of reaching immediately for abrasive tools.
Once the interior is clean, wipe new splashes after cooking whenever practical. A minute of routine care can prevent the hardened buildup that turns a simple wipe-down into a much longer job.
Related Posts

Discover the Modern Romance of the 18K Yellow Gold Lily Arkwright Comet Ring

Mindfulness for Beginners: How to Stay Present Every Day
